I’m a sucker for a cool kid DIY Halloween costume. They are easy to make, involve the kids, and clean up all odds and ends in your garage. If you haven’t made this yet, here is how to make a robot costume in four simple steps.
Now I know there are two camps here.
Camp one, Go to Target and say yes to the dress. Camp two, DIY family costumes. But let me tell you. Even if you are not a typical DIY Halloween costume maker, this idea is so simple that you won’t want to pass it up.
This post will share everything this clever and creative Halloween costume idea includes. And it is going live with enough time to save a few cardboard boxes before October 31st!
RELATED: You must check out 31 Halloween Activities for kids!

What are the benefits of a DIY Halloween Costume?
A terrific costume stops traffic. – In this case, a terrific costume stops trick-or-treaters in their tracks.
As the boys went from house to house, people of all ages gave them high fives and shout-outs. They were proud of what they had created and felt the energy as they collected candy.
And what better way to have a killer costume than to spend less than $20?

Seasonal Activity Cards
No more searching for ideas. Here’s exactly what you need to celebrate fall, Halloween, winter, and Noon Year’s Eve.
You will ADORE these 20 all-new ideas.
Benefits of a DIY Halloween Costume can be:
- Cost: Not always the case, but for this costume, it is true
- Pride: Children feel proud of what they create
- Ownership: The outfit has meaning because there is ownership
- Unique: No two costumes are alike!
RELATED: Throwing a Halloween Party? Start here!

Here is how to make a robot costume for kids
- Find a cardboard box.
- Cut out the head and arm holes.
- Cover the box.
- Find objects.
- Design your robot.
Step 1: Cut out the head and arm holes.
You found the perfect box to use for your robot costume. Yay! See, there was a reason you placed those orders a few months back. (wink, wink)
Next, we will cut out the head and arm holes using an Exacto knife. To be completely clear here, I am someone that jumps right into creating projects. Making the arm and head holes had a lot of ish measurements, and it worked out just fine!
My point? You don’t have to overanalyze where to cut the head and arm homes in your robot costume.
- Cut: First, cut the head hole at the top of the box. I made a square, but cutting a circle also works well.
- Try on: Have your child place their head through the hole.
- Adjust: Make adjustments, so your child has enough room.
- Tap: Have your child tap where the arms need to go.
- Mark: Mark the spot on the outside of the box where you feel your child tap from inside.
- Cut: Cut the arm holes.
- Try on: Have your child try on the box to ensure the head and arm holes fit comfortably.

Step 2: Cover the box.
This step takes the most time to complete but isn’t difficult. If you have big kids, invite them to help.
Use duct tape to tape the exterior of the box. Alternative ideas are to use a metallic laminate or spray paint, but I love how the duct tape looked that I would do everything the same when we make these robot costumes again.
After this step, your kids are in charge of what happens next!

Step 3: Find objects.
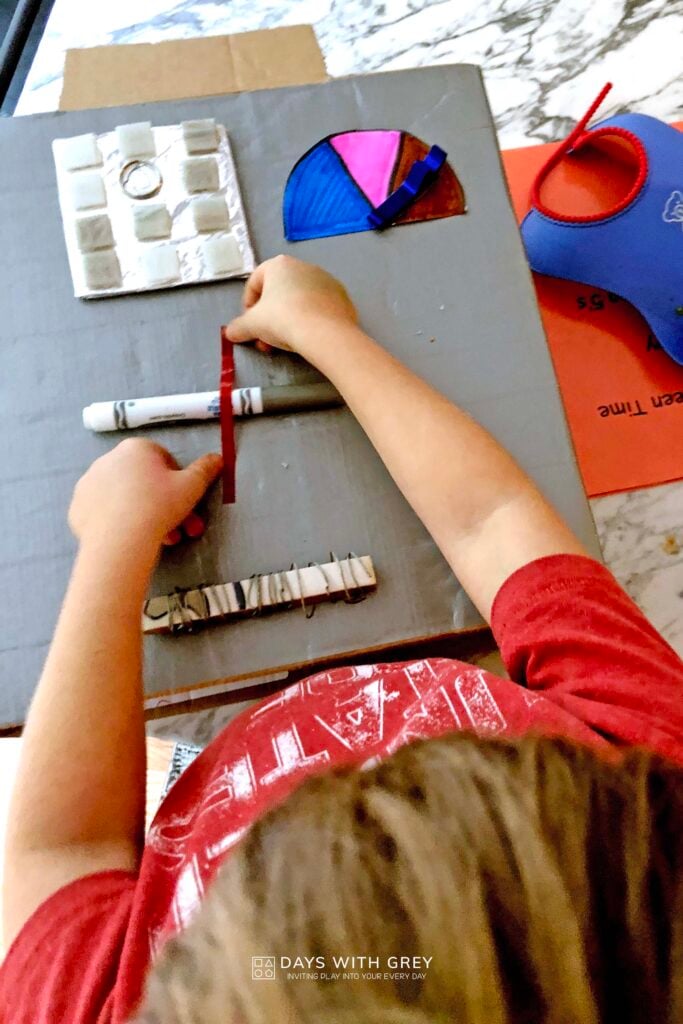
Ready for things to get fun? Let’s go on a scavenger hunt for exceptional items we find in the garage or around the house to add to our DIY robot costumes. I gave each boy a bucket, and we searched for items together.
Items to include on the kid’s robot costume:
- bottle caps
- door stoppers
- light switch cover
- marker
- old tiles from the kitchen
- paper
- pipe cleaners
- tape
- washers
- wire

Step 4: Design your robot.
Parents, try not to take over this step. I know this cannot be easy! I, too, wanted to take control and design the robot costume. Then I remembered that children take pride when they take ownership.
Can’t resist? Make an adult robot costume and design your side by side!
My job here was to be with the hot glue gun. Hot glue guns are (for lack of a better word) hot.
I want my children to know how to use the glue gun with supervision.
- Talk: Before plugging in the hot glue gun, we discussed the different parts and which ones get extremely hot.
- Make a Plan: Invite your child to place items around the box to make adjustments before gluing them onto the box.
- Glue: It’s time! Make these robot costumes come to life.
Once your DIY robot costume is dry, it is ready for trick-or-treating!

Supply list:
Days with Grey participates in the Amazon Services LLC Associates Program, an affiliate advertising program. As an Amazon Associate, I earn from qualifying purchases. Read more about these links in my disclosure policy.
- box cutter
- cardboard box
- duct tape
- items around the house
- glue sticks
- gray pajamas (optional)
- hot glue gun

Trick or Treating in your robot costume
The only issue we ran into was that leaning over for candy and eating it was easier said than done. I would let you be the judge if this was a problem or solution.
Before you go, check out these super fun Halloween activities for kids:
- Halloween Frozen Water Play Use water and Halloween items to jazz up sensory play.
- Halloween Sensory Play Plastic eyes and water makes a significant sensory bin in October.
- Pumpkin Color by Number All you need is paper and markers to start!
- Room on the Broom Paint by Number This Halloween activity is like color by number, only with paint!
- Room on the Broom Craft Make a witch’s broom out of paper rolls and craft sticks.
- Save the Pumpkins A fine motor Halloween activity for kids.
- Spider Dots – TOP-rated Halloween activity. Place the spiders on the web using dot stickers.


